
As the air grows crisp and late summer fades, search volume for autumn decor skyrockets. The absolute centerpiece of seasonal fall crafting is the classic crochet pumpkin.
This year, crafters are shifting away from basic flat circles and moving toward high-texture, modern ribbed designs that mimic the rustic look of boutique home decor. In this quick guide, we’ll show you how to crochet a ribbed pumpkin using basic stitches.
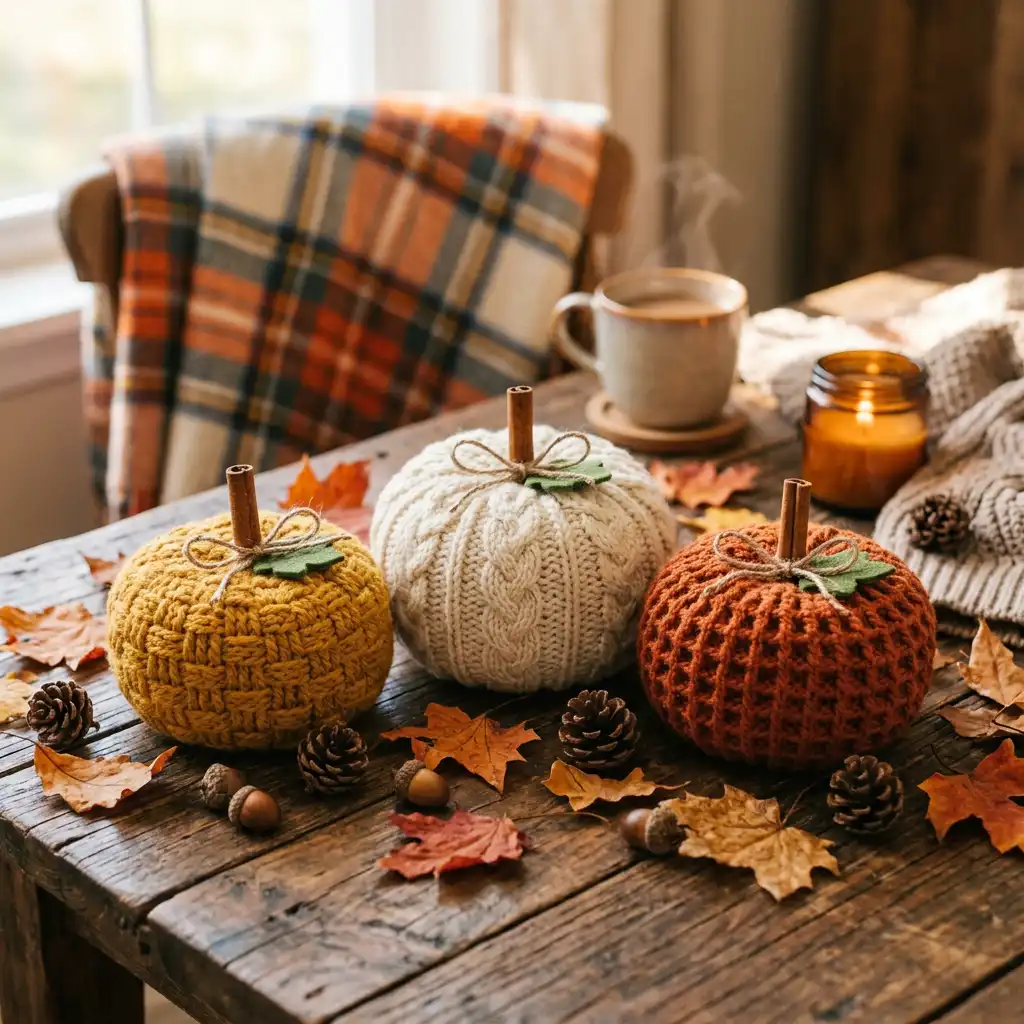
🍂 Why Ribbed Pumpkins are Trending
Traditional crochet pumpkin patterns can sometimes look a bit plain. By working in the back loops only (BLO) of your stitches, you create a stretchy, ribbed fabric that forms deep crevices when pulled together. This creates a highly realistic, plump look with half the effort of complex increases and decreases.
🛠️ Materials Needed
- Yarn: Worsted or bulky weight yarn in warm autumn colors (burnt orange, mustard yellow, warm cream).
- Hook: 5.0 mm (H-8) or 6.0 mm (J-10) hook (use a hook slightly smaller than recommended on the yarn label to keep the stuffing from showing).
- Stuffing: Fiberfill (poly-fill) or leftover yarn scraps.
- Accents: A small cinnamon stick or a piece of a tree branch for the stem, and a strand of twine or raffia.
- Tools: Tapestry needle, scissors.
📝 Step-by-Step Tutorial
Step 1: Crochet a Textured Rectangle
Instead of working in rounds, we will crochet a simple rectangle.
- Chain 26 (or more if you want a taller pumpkin).
- Row 1: Half double crochet (HDC) in the second chain from hook and in each chain across. Chain 1, turn. (25 stitches)
- Row 2: HDC in the Back Loop Only (BLO) of each stitch across. Chain 1, turn.
- Rows 3–35: Repeat Row 2 until your rectangle is about twice as long as it is tall.
- Fasten off, leaving a very long tail (approx. 20 inches) for sewing.
Step 2: Seam the Sides
- Fold the rectangle in half so the short edges meet.
- Using your tapestry needle and the long yarn tail, sew the two short edges together using a mattress stitch or whip stitch. You now have a yarn tube.
Step 3: Gather the Bottom
- Weave your needle in and out of the stitches around the bottom edge of the tube.
- Pull the tail tight to draw the bottom closed (like a drawstring bag). Knot securely.
Step 4: Stuff and Close the Top
- Turn the tube right-side out.
- Stuff the pumpkin firmly with fiberfill.
- Repeat the gathering stitch around the top edge of the tube. Pull tightly to close, but leave a tiny opening for the stem. Knot securely but do not cut the yarn.
Step 5: Shape the Ridges (The Secret Step!)
- Thread your needle with the remaining tail.
- Push the needle straight through the center of the pumpkin from the top to the bottom.
- Bring the yarn around the outside of the pumpkin, following one of your ribbed rows, and push the needle through the center again.
- Pull tight to compress the pumpkin slightly and create the sectioned ridges. Repeat this 5 to 6 times around the pumpkin.
- Secure the yarn at the bottom and cut.
Step 6: Add the Stem
Push a cinnamon stick or small twig into the top opening. You can secure it with hot glue or fabric glue. Tie a bow with twine for a rustic finish.
This article is part of our Ultimate Guide to Seasonal Crochet series.