
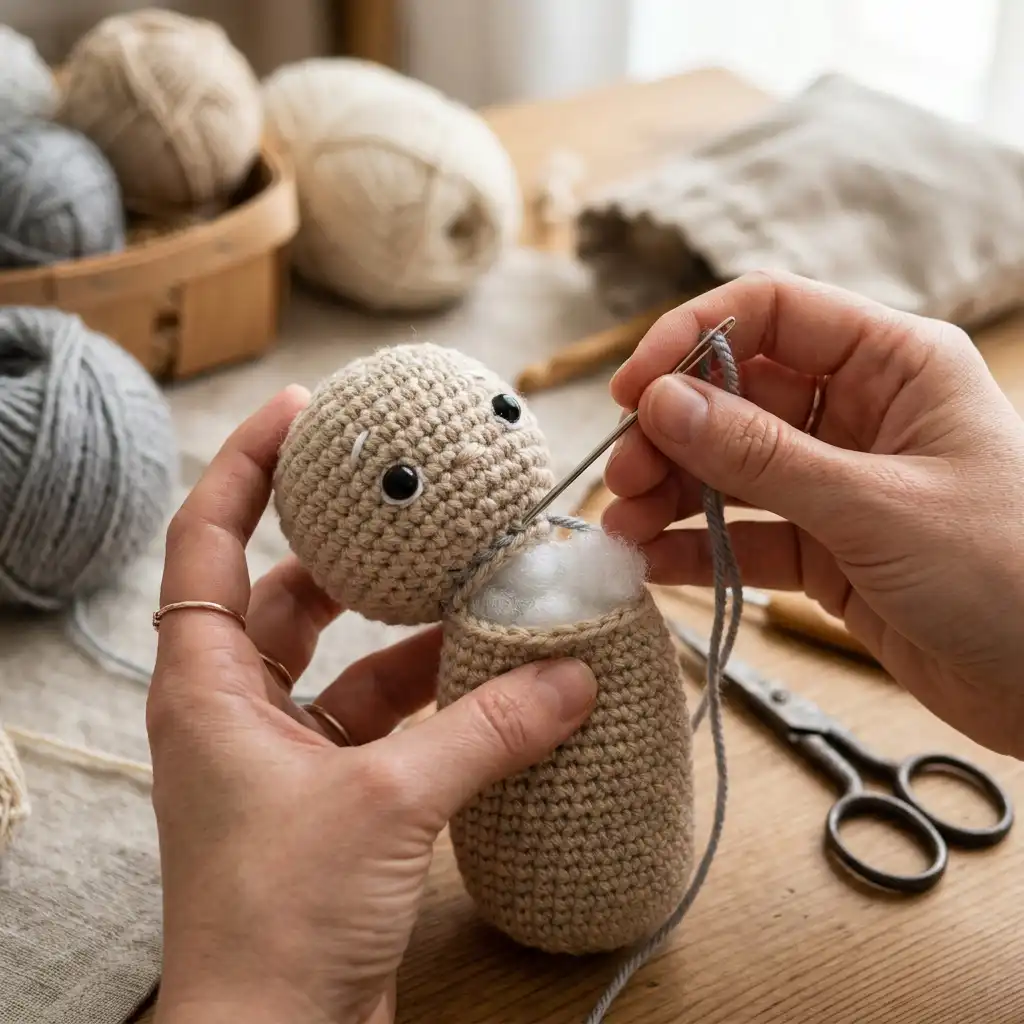
You have crocheted all the individual pieces for your plushie—the head, body, arms, legs, and ears. Now comes the stage that transforms these flat shapes into a character with personality: stuffing and assembly.
Poor assembly can make a toy look lopsided or messy, while poor stuffing can make it floppy or cause stuffing to burst through the seams. In this guide, we will cover the best techniques for stuffing, sewing, and embroidering your amigurumi.
☁️ How to Stuff Amigurumi Like a Pro
Stuffing is not just about filling a shape; it’s about sculpting it from the inside out.
- Tear It Up: Never insert stuffing in one large clump. This creates a lumpy toy. Instead, tear off small, golf-ball-sized pieces of fiberfill, fluff them in your hands, and add them one by one.
- Stuff Firmly: Amigurumi needs to be stuffed much firmer than you think. Over time, fiberfill settles and compresses. If you stuff too lightly, your toy will end up floppy and wrinkled. It should feel like a firm stress ball!
- Leave Space for Seams: Stop stuffing about half an inch before the opening of a piece. This prevents fiberfill from getting caught in your stitches while you try to sew the piece closed or attach it. Add the final bits of stuffing right before you seal the seam!
🪡 Seaming Pieces Together Neatly
Sewing pieces together is often the most challenging part of amigurumi. Follow these steps for straight, clean seams:
- Use Pins: Never try to sew parts together freehand. Use long dressmaker pins (with colorful heads) to position the arms, ears, and snout onto the body. Check the alignment from all angles before sewing!
- Leave Long Tails: When fastening off your pieces, always leave a yarn tail that is at least 12 to 18 inches long. You will use this tail to sew the pieces together.
- The Whip Stitch or Mattress Stitch: Thread your bent-tip tapestry needle. Insert the needle under a stitch on the body, then straight through both loops of a stitch on the piece you are attaching. Pull firmly. Repeat stitch-by-stitch around the entire perimeter.
👀 Face Details and Embroidery
The eyes and mouth give your toy its soul. Here are some tips for perfect features:
- Safety Eye Placement: If using plastic safety eyes, you MUST insert them before stuffing and closing the head. Once the washers are locked on the back, they cannot be moved. Double-check your round count between the eyes!
- Embroidery for Kids: If the toy is for a child under 3 years old, safety eyes are a choking hazard. Instead, use black embroidery floss (or yarn) to embroider French knots or small “closed eye” curves.
- Hide Your Knots: When embroidering mouths or cheeks, insert the needle from the back or bottom of the head (where it will later be attached to the body) and bring it out where you want to stitch. Secure it with a knot, pull tightly so the knot pops inside the head, and hide the tail inside the stuffing!