
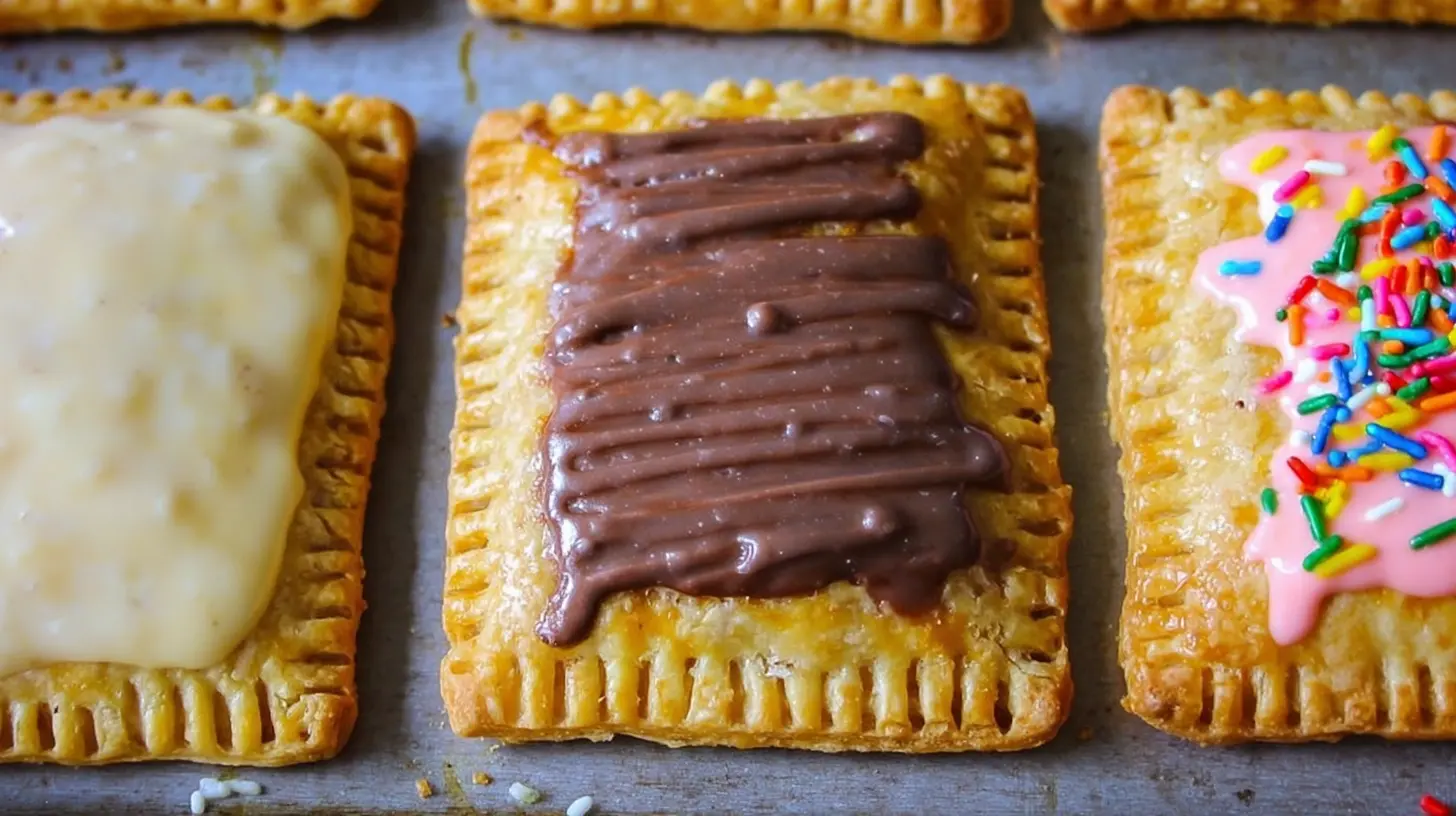
There’s something uniquely comforting about a warm, टूasty pastry, especially one that brings back childhood memories. For me, that nostalgia often comes in the form of a Pop Tart. But let’s be honest, the store-bought versions, while convenient, sometimes fall short of capturing that truly fresh, flaky, and flavor-packed experience. That’s precisely why I started making Homemade Pop Tarts, and once you try them, you’ll understand why so many others, myself included, have fallen in love with this homemade delight. It’s about more than just a snack; it’s about crafting a little piece of joy that tastes infinitely better than anything from a box.
Why You’ll Love This Dish
If you’ve ever dreamt of a Pop Tart that’s genuinely flaky, bursting with real fruit flavor, and not overly sweet, then this recipe is your answer. Homemade Pop Tarts offer a level of freshness and customization that store-bought versions simply can’t touch. They’re perfect for a leisurely weekend breakfast, a special after-school treat, or even a delightful dessert. Imagine biting into a warm pastry where you can actually taste the butter in the crust and the vibrant fruit in the filling – it’s a game-changer! Plus, the process itself is surprisingly satisfying, turning simple ingredients into something truly extraordinary.
> “I used to think making Pop Tarts at home would be too much work, but this recipe changed my mind! The crust is so buttery and flaky, and I love being able to control the filling. My kids devour these every time!” – A happy home baker
How This Recipe Comes Together
Making your own Homemade Pop Tarts involves a few simple steps, largely centered around crafting a delicious, tender pastry dough and a flavorful fruit filling. First, you’ll prepare the pastry, which is quite similar to a pie crust, ensuring it’s cold and easy to work with. Next, you’ll whip up a quick fruit filling using your favorite jam or fresh fruit. Then comes the fun part: assembling the pastries by spooning the filling onto squares of dough, topping them with another square, and sealing the edges. A quick bake in the oven, a simple glaze if you like, and voilà – you’ve got a batch of irresistible Homemade Pop Tarts ready to enjoy.
Key Ingredients
To embark on your Homemade Pop Tart adventure, you’ll need a handful of accessible ingredients. The beauty of this recipe lies in its simplicity and the ability to use quality components.
- All-purpose flour: The base for our flaky pastry.
- Unsalted butter: Crucial for flavor and that delicate, tender texture. Make sure it’s very cold!
- Granulated sugar: A touch for both the pastry and the optional glaze.
- Salt: To balance the sweetness and enhance flavors.
- Ice water: The secret to a tender, not tough, crust.
- Fruit preserves or fresh fruit filling: Your choice! Jam, pie filling, or fresh berries cooked down work wonderfully.
- Egg (for egg wash): Helps achieve a golden-brown crust.
- Powdered sugar (for glaze): Mixed with a little milk or water for a classic finish.
- Vanilla extract (for glaze): Adds a lovely aromatic touch to your glaze.
Directions to Follow
Let’s get baking! Follow these steps to create your own delightful Homemade Pop Tarts.
- Prepare the Pastry Dough: In a large bowl, whisk together the flour, granulated sugar, and salt. Cut the very cold butter into small cubes and add them to the flour mixture. Using a pastry blender, your fingertips, or a food processor, cut the butter into the flour until the mixture resembles coarse crumbs with some pea-sized pieces of butter remaining.
- Add Ice Water: Gradually add the ice water, one tablespoon at a time, mixing until the dough just comes together. Be careful not to overmix. The dough should be shaggy but hold together when squeezed.
- Chill the Dough: Divide the dough in half, flatten each half into a disk, wrap tightly in plastic wrap, and refrigerate for at least 30 minutes (or up to 2 days). This crucial step allows the gluten to relax and the butter to firm up, resulting in a flakier crust.
- Roll and Cut: On a lightly floured surface, roll out one disk of dough into a rectangle, about 1/8-inch thick. Use a ruler to help achieve straight edges. Trim the edges to create a neat rectangle, then cut the rectangle into smaller, even rectangles (e.g., 3×4 inches or 3×5 inches). You’ll need an even number of rectangles. Repeat with the second disk of dough.
- Fill the Pastries: Place half of your pastry rectangles on a parchment-lined baking sheet. Spoon about 1-2 tablespoons of your chosen fruit filling into the center of each rectangle, leaving a clear border around the edges.
- Assemble: Gently place the remaining pastry rectangles on top of the filled ones. Using a fork, press firmly around all four edges to seal the two layers of dough together. You can also poke a few holes in the top of each pastry with the fork to allow steam to escape.
- Egg Wash and Bake: In a small bowl, whisk an egg with a teaspoon of water for an egg wash. Brush the tops of your assembled Pop Tarts with the egg wash.
- Bake: Preheat your oven to 375°F (190°C). Bake for 15-20 minutes, or until the pastries are golden brown and the filling is bubbly.
- Cool and Glaze: Let the Pop Tarts cool on the baking sheet for a few minutes before transferring them to a wire rack to cool completely. While they cool, whisk together powdered sugar, a few drops of vanilla extract, and a tablespoon of milk (or water) until you have a smooth, pourable glaze. Drizzle the glaze over the cooled Pop Tarts.
Serving Suggestions
These Homemade Pop Tarts are fantastic as a standalone treat, but you can certainly elevate the experience! Serve them warm from the oven for the ultimate comfort food experience – the filling will be deliciously jammy, and the crust perfectly flaky. If you’re feeling indulgent, a dollop of whipped cream or a scoop of vanilla ice cream turns them into a dessert fit for any occasion. For breakfast or brunch, they pair beautifully with a cup of coffee or tea, or alongside a fresh fruit salad. Don’t be afraid to get creative with sprinkles on the glaze for an extra festive touch, especially if making them for special occasions or kids!
How to Store & Freeze
To ensure your Homemade Pop Tarts stay fresh, allow them to cool completely before storing. You can keep them in an airtight container at room temperature for up to 2-3 days. If your filling contains fresh fruit that might spoil quickly, it’s best to refrigerate them, where they’ll last for up to 5 days.
For longer storage, Homemade Pop Tarts freeze beautifully! Once completely cooled and glazed (or unglazed, if you prefer to glaze fresh), wrap each Pop Tart individually in plastic wrap, then place them in a freezer-safe bag or container. They can be frozen for up to 2-3 months. To reheat from frozen, you can pop them directly into a toaster on a low setting, warm them in a preheated oven at 300°F (150°C) for about 10-15 minutes, or microwave for 30-60 seconds until warmed through.
Pro Chef Tips
- Keep ingredients cold: This is the golden rule for flaky pastry! Cold butter creates steam in the oven, leading to those desirable flaky layers. If your kitchen is warm, chill your flour before starting.
- Don’t overwork the dough: Overmixing develops gluten, which can lead to a tough crust. Mix just until the dough comes together.
- Chill, chill, chill: Chilling the dough several times (after mixing, and after assembling) is crucial. It lets the gluten relax and the butter firm up, making the dough easier to handle and ensuring a tender, flaky result.
- Seal well: When pressing the edges with a fork, make sure they are firmly sealed to prevent the filling from oozing out during baking.
- Vent the tops: Poking holes in the top crust with a fork prevents steam buildup, which could cause your Pop Tarts to puff up unevenly or burst.
- Use quality fillings: The filling is the heart of your Pop Tart. Use good quality jam, or make a simple fresh fruit filling with slightly less sugar than you think you need to let the fruit shine.
Creative Twists
The beauty of homemade treats is the endless possibility for customization!
- Flavor Boosts: Introduce different extracts to your dough or glaze. Almond extract pairs wonderfully with berry fillings, while lemon zest in the dough adds a bright note.
- Savory Swaps: Ditch the sweet for savory! Fill with cooked, seasoned ground meat and cheese for a breakfast turnover, or a blend of caramelized onions and goat cheese.
- Chocolate Dreams: For chocolate lovers, a Nutella filling is divine, or a simple chocolate ganache. You can even mix cocoa powder into the dough for a chocolate crust.
- Nutty Additions: Sprinkle chopped nuts (almonds, pecans, walnuts) into your fruit filling for added texture and flavor.
- Spice it up: Add a pinch of cinnamon, nutmeg, or cardamom to your fruit filling or even the dough for a warming spice kick.
- Glaze Variations: Instead of plain vanilla, try a lemon glaze (lemon juice + powdered sugar), a chocolate glaze (melted chocolate + cream), or even a cream cheese glaze.
Common Questions
How long does it take to make Homemade Pop Tarts?
While the active preparation time is around 30-45 minutes, you’ll need to factor in chilling time for the dough (at least 30 minutes, or longer if preferred), plus 15-20 minutes for baking. So, plan for a total of 1.5 to 2 hours from start to finish, including chilling.
Can I use store-bought pie crust for this recipe?
Absolutely! If you’re short on time or prefer a shortcut, good quality store-bought pie crust (rolled out into a rectangle) works well. Just ensure it’s a “flaky” pie crust, not a crumbly one. This will significantly reduce your prep time.
My Pop Tarts are bursting open in the oven, what went wrong?
This usually happens if the edges weren’t sealed firmly enough, or if you didn’t poke enough holes in the top crust to allow steam to escape. Make sure to press down well with a fork all around the perimeter and add a few vents to each pastry before baking. Using a filling that is too wet can also contribute to blowouts, so ensure your fruit filling isn’t excessively watery.
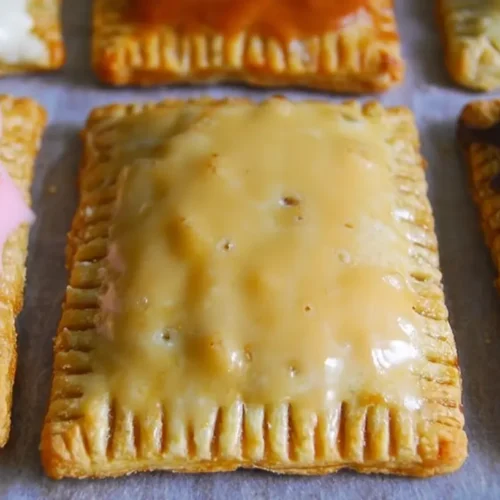
Homemade Flaky Fruit Pop Tarts
Equipment
- Large bowl
- Pastry blender or fingertips
- Rolling pin
- Sharp knife or pastry wheel
- Parchment-lined baking sheet
- Fork
- Whisk
Ingredients
Dough
- 2 cups All-purpose flour
- 1 cup Unsalted butter very cold, cut into small cubes
- 2 tablespoons Granulated sugar
- 1/2 teaspoon Salt
- 1/2 cup Ice water plus more if needed
Filling & Assembly
- 1 cup Your favorite jam or fruit filling
- 1 Large egg beaten (for egg wash)
Glaze (Optional)
- 1 cup Powdered sugar
- 2 tablespoons Milk or water
- Sprinkles Optional
Instructions
Dough Preparation
- In a large bowl, combine flour, 2 tablespoons granulated sugar, and salt, then cut in the very cold butter until it resembles coarse meal with pea-sized pieces.
- Gradually add ice water, one tablespoon at a time, mixing until the dough forms; divide into two discs, wrap, and refrigerate for at least 30 minutes.
Assemble & Bake
- On a floured surface, roll out one dough disc to 1/8-inch thick and cut into 3×4 inch rectangles; repeat with the second disc to yield 12-16 rectangles.
- Place half of the rectangles on a baking sheet, spoon 1-2 tablespoons of jam onto each, leaving a border.
- Brush edges with egg wash, top with remaining rectangles, press to seal, and crimp with a fork.
- Prick tops of pop tarts with a fork, brush with egg wash, and bake at 375°F (190°C) for 15-20 minutes until golden brown.
Glaze (Optional)
- Once cooled, whisk together powdered sugar and milk/water for the glaze; drizzle over pop tarts and add sprinkles if desired.